
Dolby recording tips
Now that you’ve recorded your audio or video, it’s time to produce your track with some easy-yet-powerful editing tools. In other words, now comes the fun part!
We recommend always wearing headphones when editing. Tap the “Sound Tools” button to get started.
1. Styles
Styles help you choose the perfect enhancement for your newly recorded track. Technically speaking, Styles are target sound profiles that Dolby’s unique dynamic EQ applies to your recording.
Think of Styles as the audio equivalent of Instagram photo filters. Here are the different Styles you have to play with:
- Standard – Dolby On’s signature curve, adapted to your style
- Amped – enhanced bass and treble for an exaggerated rock profile
- Lyric – vocal presence without compromise
- Deep – for when you need bass and you need it loud
- Natural – classical inspired with a smooth, mellow curve
- Thump – EDM influenced, but works for any genre
- Off – neutral with no EQ effect
Tap to choose the perfect Style for your recording. Tap again to adjust the intensity.
It’s easy to give each Style a quick try — experiment and see what you like!
2. Noise Reduction
When Noise Reduction is switched on it cleans away unwanted background noise measured during the countdown. That’s why it’s important to be as quiet as possible during those three seconds. Dolby On listens for static background noise and then cancels it out. Volume spikes during the countdown can lead to unwanted effects during recording.
Removing white noise from guitar amp hum, air conditioning fans, and even the buzz from lights are prime examples of when you should use Noise Reduction.
But, if you’re recording a live show and you want crowd noise as part of your final cut, then you probably don’t need Noise Reduction.
NOTE: you can switch Noise Reduction and the Countdown, on and off in your Settings. When switched on, you can quickly toggle back and forth during editing to see which option works best.
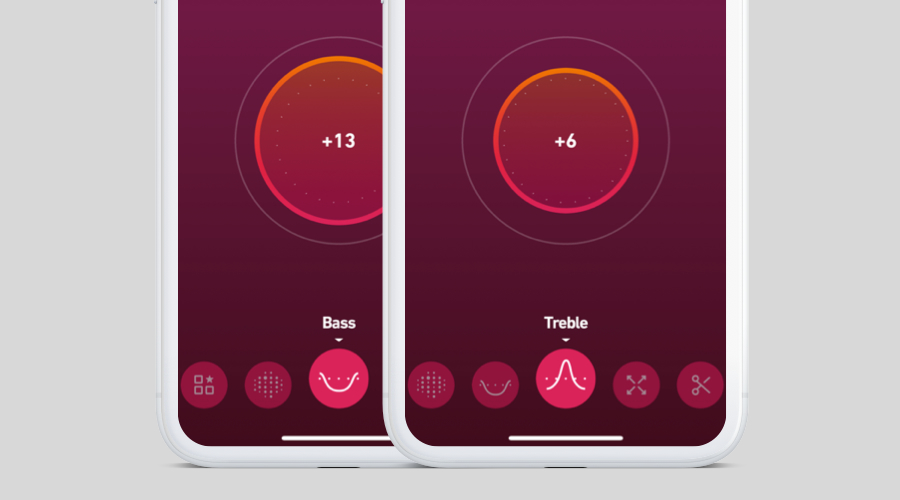
3. Bass and treble control
Bass and treble, while also referring to musical clefs, refer to tones whose frequencies are on the lower and higher end of human hearing. Bass is lower, treble is higher.
Adjust bass and treble independently for a sound that fits your style. Add more bass for more drums and bass guitar or turn up the treble to amplify vocals for acoustic tracks.
4. Boost
Boost combines professional compression and limiting to give you the ideal loudness for your track.
Dolby On automatically adjusts the loudness to the industry standards on popular music platforms, but that may not always be right for you. For a louder, more compressed sound, dial up the Boost. For more dynamic range and space, dial it down.
Play around with Boost and see how it can help your recording.
5. Trim
Use the Trim tool to determine the start and end points for your recording. For finer control, slide your finger down to trim your track by fractions of seconds.
Don’t forget to add animations. Most social media platforms are designed for sharing video and don’t allow audio-only content. By adding one of our animations to your audio-only creation, you’re now able to share your audio to these platforms.
After you’re all done with animations, tap the share button to directly upload audio to SoundCloud, or videos to Facebook, or Instagram.
Next up, learn how to use Dolby On to record video like a pro.
Want to be the first to hear about new features, tips, tricks, and more? Subscribe to our email list in the app, under Settings. Happy Recording!